Unboxing Your New Gear
So you’ve got your brand-new takedown recurve bow – I’m so proud of you, son. Wait… what?
Before you rush in, there are a few things we need to mention. After all, setting up your takedown recurve bow correctly is crucial for performance, safety, and longevity. Follow this step-by-step guide to assemble, tune, and prepare your bow for your first shots.
** THE GOLDEN RULE OF ARCHERY: DO NOT DRY FIRE YOUR BOW! **
We mean it – never pull back the string and release it without an arrow. Doing this can (and will) destroy your bow. If you’re lucky, only your limbs will crack. If you’re unlucky, the bow explodes in your hands and you walk away with a story that ends with “…and that’s how I almost lost an eye.”
The only thing worse than dry firing? Shooting people. Don’t do that either.
Here’s what you should have in your kit:
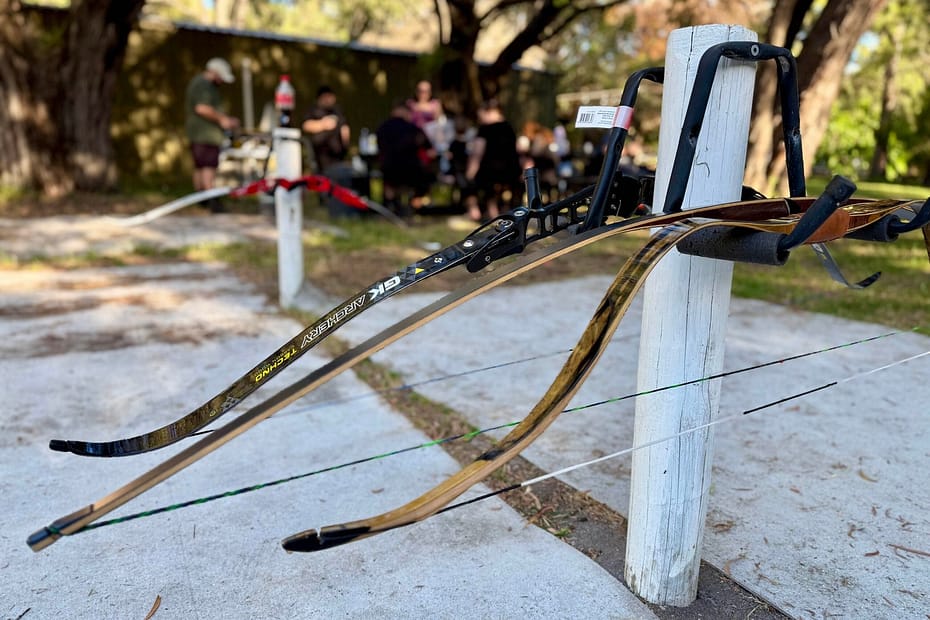
– Riser – The central part of the bow that connects the limbs.
– Limbs (Top & Bottom) – Usually marked for orientation.
– Bowstring – Essential for bringing everything together.
– Limb Bolts or Allen Wrench – If your bow requires manual tightening.
– Bow Stringer – Highly recommended for safe stringing.
– Nocking Points and Arrow Rest – Optional but useful accessories.
If anything is missing or appears damaged, contact your supplier before proceeding. It’s always better to replace faulty or missing parts before assembly to ensure a smooth experience.
Attaching the Limbs
Your bow isn’t much of a bow yet – let’s fix that.
Time to bring your bow to life! The limbs are what give it power, so let’s make sure they’re attached correctly (and the right way around – trust us, it happens).
Step 1: Identify the Limbs – Most are labeled TOP and BOTTOM near the base. If not, look for any images or text—you should be able to read any writing on the bow normally when holding it upright. Also, check the curve of the limbs – they should bend away from you, not toward you. If your bow looks like a sad, backward “C”, something has gone horribly wrong.
Step 2: Attach the Limbs to the Riser – Line up the limb brackets with the riser slots, then secure them using the limb bolts. Tighten them with the Allen wrench, but be careful not to overtighten them.
Stringing Your Bow (Safely!)
Stringing a recurve bow correctly and safely is crucial to avoid damage (to both the bow and yourself). A bow stringer is your best friend.
Attach the Bowstring
The larger loop goes on the top limb, and the smaller loop on the bottom limb. Slide the top loop down slightly so it remains loose, and make sure the bottom loop is fully seated in the limb grooves.
Use a Bow Stringer
Place the pouch end over the bottom limb and the saddle end (or second loop) over the top limb. Step on the stringer evenly with both feet, keeping the bow upright. Pull the riser upward in a smooth motion to flex the limbs.
Secure the Bowstring
While holding tension with the stringer, slide the top bowstring loop into the limb groove. Slowly release the pressure on the riser, allowing the limbs to settle.
Want a Hands-On Demonstration?
Some things are easier to learn by watching and this video is no exception. We highly recommend checking out this guide on how to string your bow properly:
Checking Brace Height & Tuning
Too high, too low, or just right? Let’s find out.
Brace height – the distance between your bowstring and the deepest part of your grip – directly affects your accuracy, comfort, and how well your bow performs. If it’s wrong, you might notice weird vibrations, bad arrow flight, or the feeling that your bow just isn’t shooting right.
Step 1: Measure Your Brace Height – Use a bow square (T-square) to measure from the string to the deepest part of the grip. Your bow’s recommended brace height can usually be found in the manual, but for most recurves, it’s between 7.5″ and 9″.
Step 2: Adjust if Needed – If your brace height is too low, twist the bowstring a few times to shorten it (raising the brace height). If it’s too high, untwist it slightly to lengthen the string.
Step 3: Test the Feel – Let’s refresh your mind back to dry-firing, let’s not do that! Instead, you can give the bowstring a light pluck – it should sound crisp, not buzzy. Shoot a few arrows and see if your shots feel smooth. If something feels off, tweak the brace height until you find the sweet spot.
Pro Tip: A properly set brace height reduces hand shock and string slap, making your shots feel effortless and consistent.
Installing the Arrow Rest (Optional)
Arrow Rest or Shelf? Let’s Set It Up
Shooting off the shelf is traditional, but an arrow rest makes things smoother. Some bows come with an arrow rest, while others are designed for shooting off the shelf. Either way, you’ll need to set up your arrow support properly to avoid weird arrow flight.
Shooting Off the Shelf – To prevent excessive wear on the bow (and improve arrow flight), most archers use shelf fur or a leather pad. Many shelf furs come with a pre-cut template to help you position them correctly. If you’re using fur, make sure the hairs run in the direction of the arrow’s path (toward the target). Installing it the wrong way creates unnecessary drag and affects your shot.
Using an Arrow Rest – A stick-on or screw-in rest lifts the arrow slightly, reducing wear on your bow and improving consistency. If you’re using a stick-on rest, clean the riser and place it just above the arrow shelf, some stick-on rests have a hole for a plunger, we like to have this hole lined up with the plunger hole on the riser. If you’re using a screw-in rest, it’s pretty straight forward, you want it firm, don’t over tighten them
Pro Tip: Some archers swear by shooting off the shelf for a more traditional feel, while others love the consistency of an arrow rest -experiment and find what works for you!
Installing a Nocking Point
Setting Your Nocking Point for Consistent Shots
A nocking point is the small marker on your bowstring that tells you exactly where to place your arrow every time. Without one, your arrows will be inconsistent, unpredictable, and can lead to frustrations.
Measure Your Nock Placement
Use a bow square to measure about ½ inch above the arrow rest. This is where your nocking point should go for most recurve bows.
Attach the Nocking Point
There are two common ways to do this:
Tied Nocking Points – Use dental floss, serving thread, or a small knot to secure it in place.
Metal Nocking Points – Clip them onto the string with nocking pliers.

Test and Make Adjustmetns
Nock an arrow and see if it sits level. If it’s pointing too far up or down, adjust the nocking point slightly until it aligns perfectly.
How Nocking Point Affects Tuning
Your nocking point placement directly affects arrow flight. Too high or too low, and you’ll get porpoising—where your arrows dive and rise in midair like a fish out of water.
- Too Low? Your arrows will nose-dive into the target.
- Too High? Your arrows will kick up and sail unpredictably.
- Just Right? Your arrows will fly cleanly and consistently without unwanted vertical movement.
? Pro Tip: If your arrows keep acting weird, adjust the nocking point in small increments—about 1mm at a time—until they fly straight and true.
Tiller & Final Adjustments
Tiller Adjustment – Finding the Right Balance
Tiller refers to the balance between your bow’s top and bottom limbs. If this balance is off, your bow might feel awkward to draw, or your shots may be inconsistent. Most modern bows come pre-tuned from the factory, but it’s always worth checking—especially if you’re shooting barebow or using a different finger placement, like split-finger or three-under.
To check your tiller, use a bow square and measure the distance from the riser to the bowstring at both the top and bottom limbs. A slight difference—anywhere from 3 to 6mm—is normal, but a more significant imbalance can create issues. If your bow has adjustable limb bolts, you can fine-tune this by slightly tightening or loosening a limb until the measurements feel even. If your bow isn’t adjustable, don’t stress – most traditional shooters simply adjust their form to compensate.
Barebow archers often tune their tiller differently depending on their shooting style. Many prefer a slightly stronger bottom limb to balance their hold at full draw. This is because barebow archers don’t use sights and often rely on string walking or gap shooting, which can change the way the bow naturally balances. A more exaggerated tiller adjustment may be necessary for comfort and consistency.
Once adjustments are made, draw the bow and hold it at full draw. It should feel even, with no weird tilting or tension differences. Shooting a few arrows will tell you if things feel right—if your bow kicks oddly or vibrates more than expected, your tiller might need some fine-tuning.
If you’re shooting three-under, many archers prefer to have the bottom limb slightly stronger than the top for better stability. If you’re shooting split-finger, a balanced tiller or one that’s slightly top-strong may feel more comfortable.
Pro Tip: Don’t overthink tiller adjustments unless something feels noticeably wrong. If your bow feels good and shoots well, you’re probably fine!
Okay, who’s ready for another new bow!?
You know you want one…